Disclaimer: This post may contain affiliate links. As an Amazon Associate, I earn from qualifying purchases.
Pull-on garments are the staple of my casual wardrobe. Since I sew them often, putting elastic in a waistband casing is something I do all the time.
And, I often do it using a bodkin or safety pin. You can use this method to replace old elastic or add some to a new garment.
In this tutorial, I’ll tell you how to do it, the materials I use, and the full process from choosing the elastic to pulling it through. I’ll also discuss fitting and show how to secure the elastic in the garment.
Materials
These are the things you’ll want to get for this project.
- Garment with elastic waistband
- Elastic
- Bodkin/Safety Pin
- Basic sewing supplies
How to Put Elastic in a Waistband Casing

We’re going to assume that your casing has already been made. It’s the tunnel in which the elastic sits in.
I’ll use a waistband with one opening in the back. You can use this same method for sleeves, around ankles, and even accessories like headbands.
1. Choose your elastic.

If you’re sewing a pattern, it should tell you the suggested elastic width. You’ll want to use that measurement, or slightly smaller will work.
For my shorts, I’m using 1-inch knit elastic. The casing is bigger, so I know it’ll go through easily.
2. Measure the elastic.

You’ll want to measure the length of elastic you’ll need for the casing. Let’s say I’m making shorts that will sit on my belly button.
If my low waist measures 30 inches, I’ll make sure I have that plus extra to fit and overlap. So, I’d have at least 34 inches of elastic.
I know I’ll wear them around my low waist. When I try them on, I’ll adjust to what’s most comfortable.
I account for my stomach growing throughout the day. Some people don’t mind tight elastic around the belly, but I do.
At this point, some people cut their elastic. I don’t do this until the very end.
3. Find the opening.
The casing should have an opening where the elastic goes through. Sometimes it’s centered in the back, and sometimes it’s sewn along the waistband.
The opening should be bigger than the elastic. That way it’ll go through the casing.
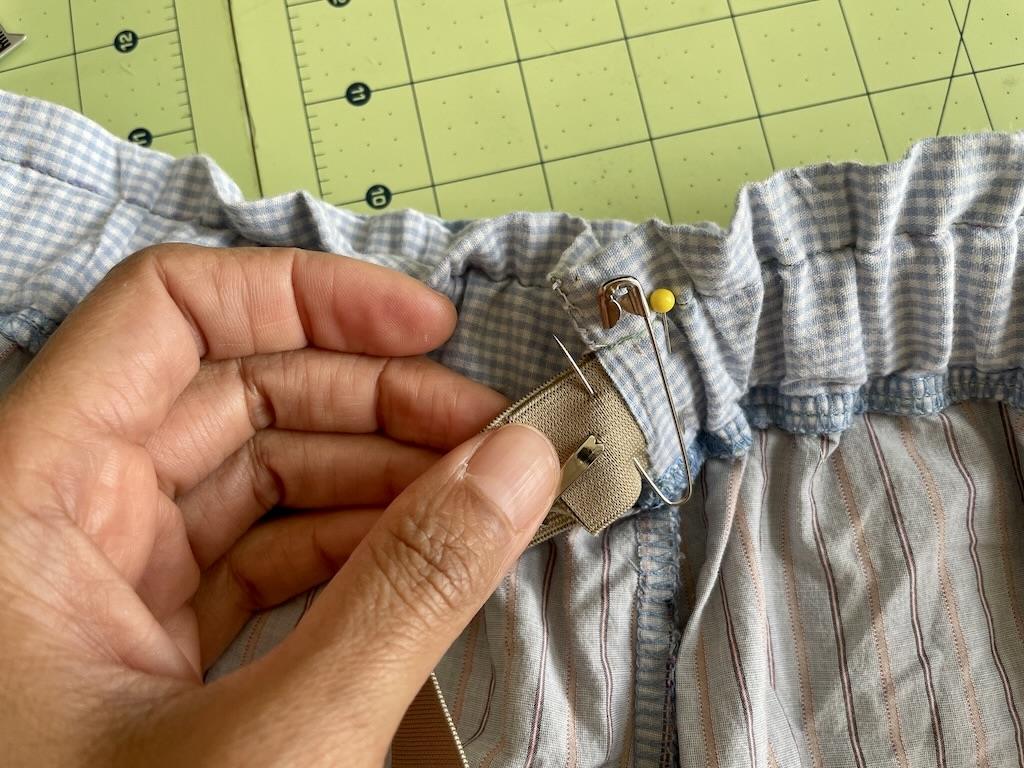
4. Secure the elastic.

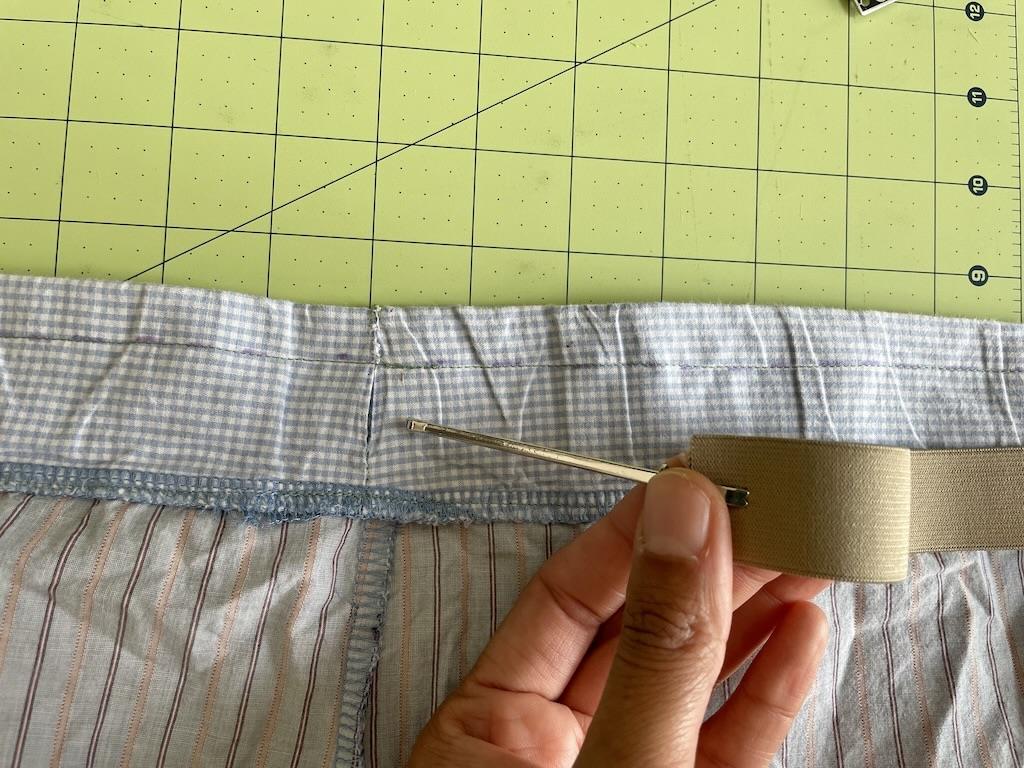
Now you’ll secure the elastic to a guide to pull it through. If you try to push it through without, it’s really difficult.
I’m using a bodkin, which has a ball tip and clamps onto one end of the elastic. That way I can guide it through the casing with the elastic trailing.
If you don’t have a bodkin, you can use a safety pin/baby pin.
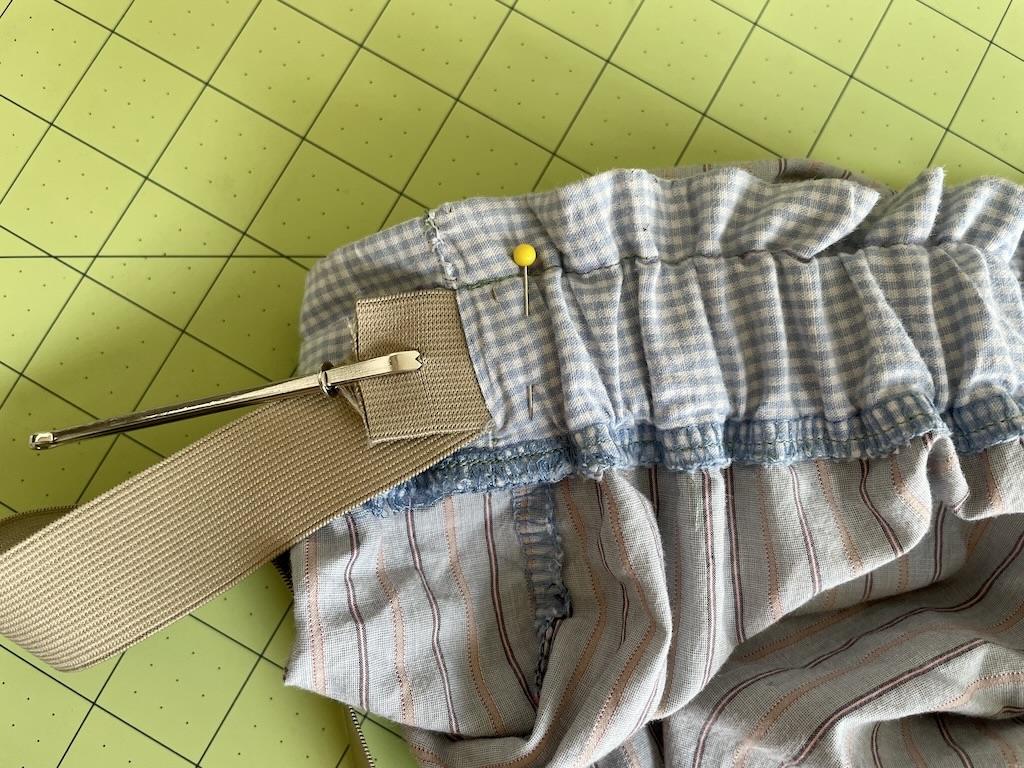
5. Pull the elastic through.

Now, you’ll pull the elastic through the opening in the casing. Keep it nice and flat so it won’t twist in the casing.
I work the elastic little by little to minimize this. Keep feeding it through until you come back around to the opening.
6. Secure the end.
At this point, I like to secure the end with the bodkin with a straight pin. That way, the elastic won’t go back down into the casing.
Now you’ll have both ends of the elastic coming out of the opening. You’ll want to even out the elastic so it’s not all bunched up.
7. Adjust the fit.
Now you’ll adjust the fit. Make sure you feed through enough elastic to fit where you want the garment to sit on your body.
Now, you’ll pin the ends together with a baby pin. Remove the straight pin before trying it on.
8. Mark the elastic.
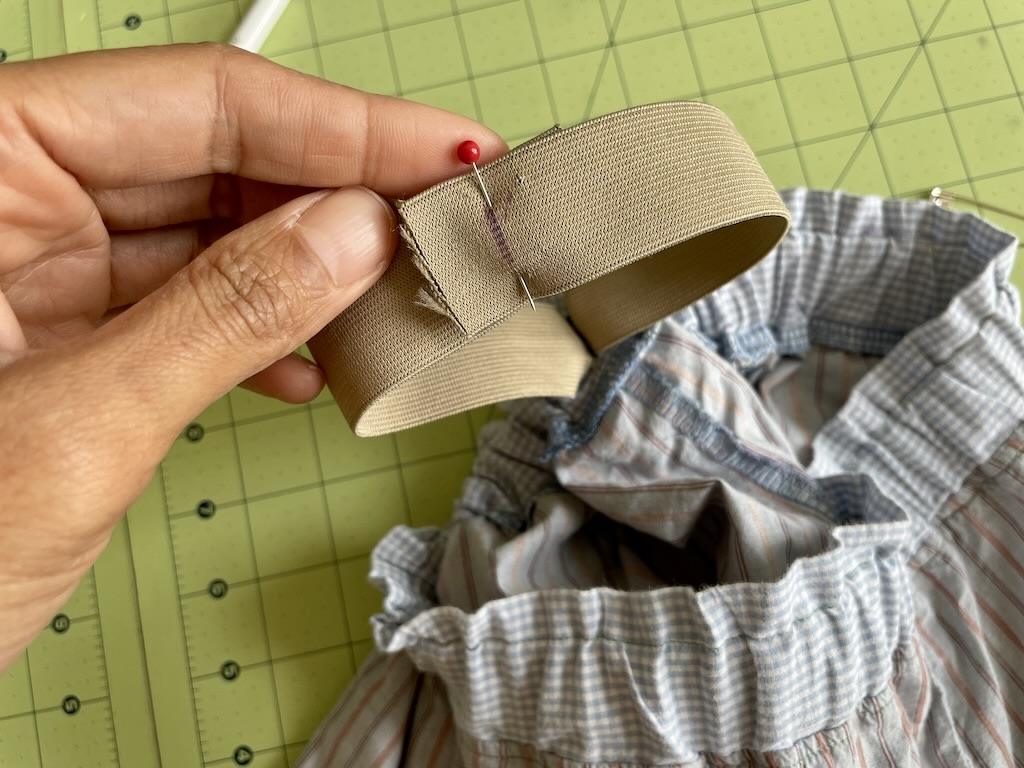
Now, mark where the pin was on both sides. I lined up the marks and used a straight pin through the elastic.
You should have some overlap on both sides of the pin. If you haven’t cut off the excess elastic roll, you can do that now.
9. Sew the elastic.

You’ll want to check to make sure your elastic is flat around the casing before sewing. If it is twisted, straighten it out.
Secure the elastic by sewing a zig-zag stitch on both ends. I sew through a couple of times.
10. Sew up the opening.

Push your elastic through the opening so the whole thing is in the casing. I hand-sewed the opening using a whip stitch.
You only want to stitch up the opening and not catch the elastic.
11. Tack the sides.

This is optional, but I always do it. I like to tack the elastic through the casing so it won’t roll.
Stretch the elastic to even it out around the casing. Make sure it looks even all the way around, and there’s no twisting or bunching.
Then, you’ll sew a couple of stitches through the casing and elastic.
Yeah! All done!
Additional Notes

Before you secure your elastic, always fit it to make sure it’s comfy.
Sewing patterns may come with an elastic guide. I don’t use this, as it tends to be too tight for me.
Make sure your casing is always wider than the elastic. For example, if I have a casing that’s 1-1/2 inches (1.5 inches) wide, I’ll choose elastic that’s 1-1/4 inches (1.25 inches) wide. We could even go for 1-inch wide elastic as it’d glide easily through the casing too.
If you’re replacing old elastic, you need to remove it first. Undo any tacks or stitches with the seam ripper. Once the elastic is free, pull it out of the opening.
Final Thoughts

I’m always putting elastic in waistband casings, and now I’ve gotten fast at it. It’s a great skill to have, whether you sew or not.
I’ve had to fix way too many faulty store-bought pants. Maybe that’s why I’m always making my own clothes!
More About Sewing
I have other related posts on my blog. You might want to check them out.
- Speaking of elastic, let’s take a look at all the different types for sewing.
- I’ll tell you the types of waistband elastic I use for a comfy fit.
- If you’d like to change up the look of your shorts, try my ruffle waist shorts hack.
- Let me give you some fashion sewing tips from my years of experience.
I’d love to hear all about your sewing journey!
Originally published: June 23, 2025