Disclaimer: This post may contain affiliate links. As an Amazon Associate, I earn from qualifying purchases.
Veteran’s Day is here, and I made a DIY military-style jacket in a short length. With the flap pockets, it really looks like the one my grandpa wore.
He served in the World Wars and even lied about his age to join the military. Although we never got the chance to meet, this garment makes me think of him.
I’ll tell you all about my creation, including the fabric, notions, process, and share photos. You might end up making one of your own.
Simplicity S8700 Jacket Pattern

When I bought Simplicity S8700 sewing pattern, I wanted to collect all of these in the Pattern Hacking series. Although I do a lot of self-hacks, I like their design.
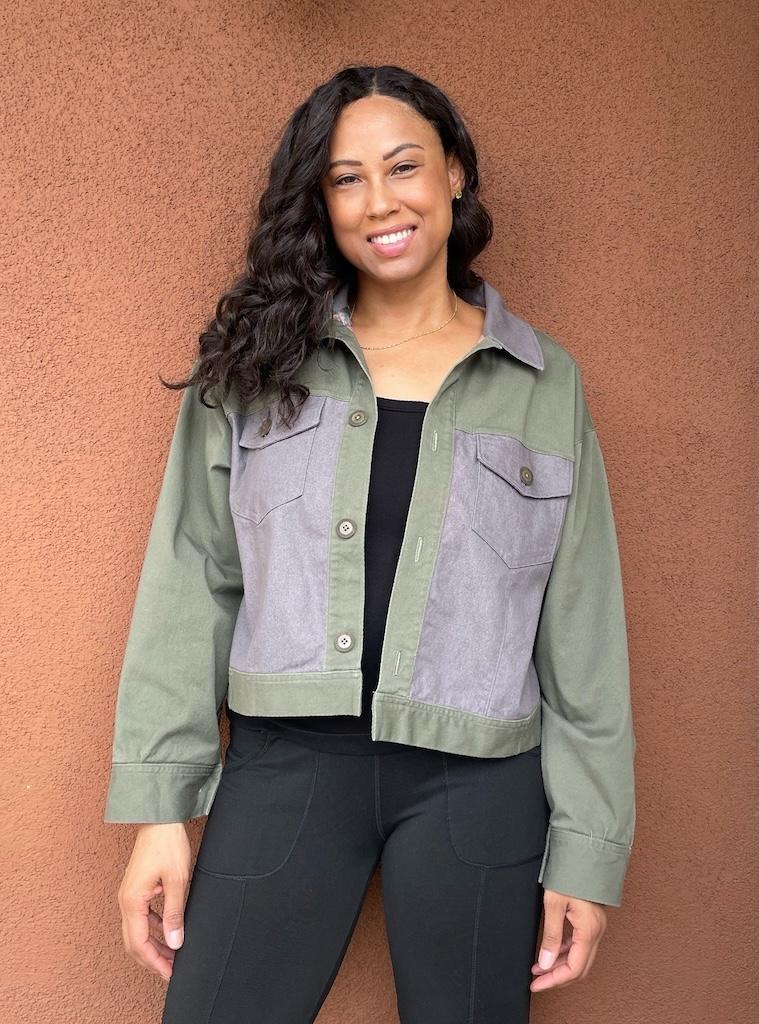
Overall, it’s a boxy, relaxed-fitting piece, and it runs on the larger size. I see this as a military-style, but it’s also known as a utility jacket.
They give you the base pattern, which is an unlined, button-up jacket with a collar, front patch pockets, sleeve bands, and shoulder tabs.
You can make it either long or short length and change up the sleeves and bodice.
The hacking options include utility with drawstrings and flap pockets, trimmed with ruffle sleeves, and frayed peplum. You can also add decor to the jacket.
Fabric and Notions
Here’s everything I used for this project. I’m so glad I had these cool buttons in my stash.
Fabric

I used a linen-blend fabric from Joann to make my maroon-colored jacket. And I bought a lot of it in different colors because it was on sale at Joann.
I do like this fabric because it’s breathable and nice for taking a stroll in the heat. It blocks the sun’s rays and keeps me cool.
The black jacket was made with a woven cotton-poly blend from Joann too. I’m allergic to polyester, but I used this fabric anyway because it was in my stash.
It’s actually on the breathable side and lighter. I like that it doesn’t wrinkle and has a lot of structure.
For the lining of the yoke, I used cotton voile that I bought from Mood Fabrics.
Suggested fabrics include chambray, cotton types, denim, gabardine, linen types, poplin, and twill. Some views require fringeable fabrics.
Notions
Depending on the length you make, you’ll need 4 or 5 buttons that are 3/4 inches (0.75 inches). If you make shoulder tabs, you’ll need 2 more buttons.
For the drawstring waist variation, you’ll need 2-3/8 yards (2.375 yards) of 1-inch-wide twill tape.
I used medium-weight fusible interfacing for both jackets.
Needle

I used a 90/14 universal needle for all fabrics, and it worked just fine with the weights.
Thread
For my sewing machine, I used matching Gutermann universal thread made of 100% polyester.
For the serging, I used Maxi-Lock spun thread, and it’s made of 100% polyester too.
Sewing My Jacket
The directions for sewing this jacket were pretty easy to follow. You’ll find their design hacks looped in there too.
Prepping

The first version of this jacket was my mockup in linen. I wanted to make a wearable muslin because I wanted to use this pretty colored linen.
So I made it in size medium because at the time I was between sizes, so I sized up. I always have this thing with the sleeve length because I have long arms.
Although linen is a suggested fabric, my jacket looked baggy. That’s because this linen was a blend and didn’t hold structure.

I added four open patch pockets in the front and shoulder tabs. The buttons matched with this jacket, but might be a tad too heavy.
I liked the length, but thought of bringing it in at the waist, so I made a tie belt. I should have just made the utility jacket with a drawstring.

Then it was time to cut my black jacket. I barely had enough fabric. No, I didn’t have enough!
I had to sew together small pieces to cut the yoke. But it worked out!
Construction

After making my mockup and cutting my black fabric, it was time to get started on the real deal. Since my mockup turned out well, except for it not being as structured as I wanted, I was happy.
The black fabric was very stable, which I thought was perfect. I actually thought it was going to be too stiff, but it wasn’t.

The first thing I did was make the back and front pieces. That means I had to attach the pockets and flaps.
You can make 2 to 4 pockets, but I think adding all four pockets looks the best.
I always like to make my patch pockets first, just to get them out of the way. Even if they get sewn last.

Then came the back, yoke, and yoke lining. By the way, I love using a print contrast fabric on the inside.
The shoulder tabs had to be attached before adding the sleeves. And the buttonhole needs to be lined up just right.
Speaking of the sleeves, you can make a standard hem, which is the easier option. I went for the band, which wasn’t difficult, but it took more steps.

Next, I added the collar, facing, and buttons. I know I whipped through that like it was easy.
But the collars can be a challenge to fit on the neck edge. The trick to this is to cut notches, if needed, to get it to fit.
Adjustments

I didn’t make any adjustments to this jacket. However, after wearing it a couple of times, I did size it down to a small.
It is a little big, so I wouldn’t size up. Plus, it’s a boxy shape, so next time I will add the drawstring.
I actually tried to add darts in the back, but it just didn’t look right. I made the different widths and lengths, but it didn’t look right.
Also, I made my black jacket a shorter length than the maroon one. I like it better this way.
Finishing Details

I topstitched everywhere I could on my black jacket. The linen one didn’t need it as much, but the black one did because there was a lot more structure.
I also added my shank buttons, which were sew-on.
Next time, I might experiment with lining the whole inside of the jacket. Yeah, let’s see what happens!
Also, I was thinking about adding some emblems or stripes like they have on the model. I haven’t found any that I like yet, but I might use some iron-ons.
Project Notes

Make sure you use interfacing when sewing this jacket. You’re going to need it with the collar band, tabs, shoulder tabs, pocket flaps, and facing.
You can use a contrast fabric like I did for your yolk lining. That way, you can make the inside pop a little bit.
I think the more structured fabric looks better with this design. So I’m not going to make it in linen, unless I’m making a shirt.
I’m thinking this would make a nice oversized shirt, especially with the ruffle sleeves and bottom.
Final Thoughts

I think my jacket turned out pretty nicely. I’ll probably add more trims the next time I make this pattern.
Otherwise, it’s fun to wear, and it goes with many things in my wardrobe. In fact, this is one of my most favorite pieces to throw on with jeans.
More Sewing Projects
I have many other related posts on my blog. You might want to check them out.
- A T-shirt would look great under this jacket, and I made the perfect one.
- What about some outerwear sewing tips to help you make more polished pieces?
- I love wearing this jacket over my red knit maxi skirt too.
I’d love to hear all about what you’re working on in your sewing room!
Originally published: November 11, 2025