Disclaimer: This post may contain affiliate links. As an Amazon Associate, I earn from qualifying purchases.
I made a DIY cardigan coat in cotton woven herringbone fabric! And it’s absolutely cozy and I love wearing it.
This is a nice change from making a long sweater coat in knit material. And I added a big ol’ button to top it off!
And I’ll tell you all about the pattern, materials used, process, and share photos of my creation.
Simplicity S8742 Cardigan Pattern

I bought Simplicity S8742 sewing pattern a while ago. Although it’s not labeled as such, you can use it to sew a cardigan coat or coatigan.
It has a simple, straight design, relaxed fit, and length variations. There are lapel options to make a simple or cascading one.
I love the big front patch pockets. It only has 7 sewing pattern pieces total.
This pattern is rated average, and I’d say someone at an intermediate level could tackle it.
Materials
Here are all the things I used for this project, which weren’t too many.
Fabric

I yearned to use this herringbone brushed cotton fabric in my stash. It’s a woven fabric from Joann that feels like wool.
In fact, before looking at the material contents, I thought it was wool.
The weight is between medium to heavy, so it’s on the thicker side. But the weave is not super tight, and the material is breathable.
The fabrics that would work are boiled wool, double knit, fleece, and pointe. For the variation I made, you could even use light denim, brocade, and poplin.
Notions
Depending on the lapel you make, you might need satin ribbon or elastic. I added a big button to my garment.
Needle

I used a size 90/14 universal needle on this fabric. The directions will tell you to use a ballpoint needle, but I wasn’t sewing stretch fabric.
Thread
For general sewing, I used matching Gutermann universal thread made of 100% polyester.
To serge the seams, I used Maxi-Lock spun thread. It’s for overlocking and made of polyester.
Sewing My Coat

Sewing this coatigan was pretty straightforward. I followed the directions all the way through—surprise, surprise!
Prepping
I washed this fabric on delicate and put it in the dryer to pre-shrink it. Although it held up, I won’t do this again. I’m sure pilling will start to happen.
I decided to cut a size medium because I’m between sizes, and I typically wear this size. However, in the future, I’ll probably size down.
Cutting this fabric was easy because it was so stable. If you’re a beginner, I’d recommend starting out with a fabric like this.
Construction

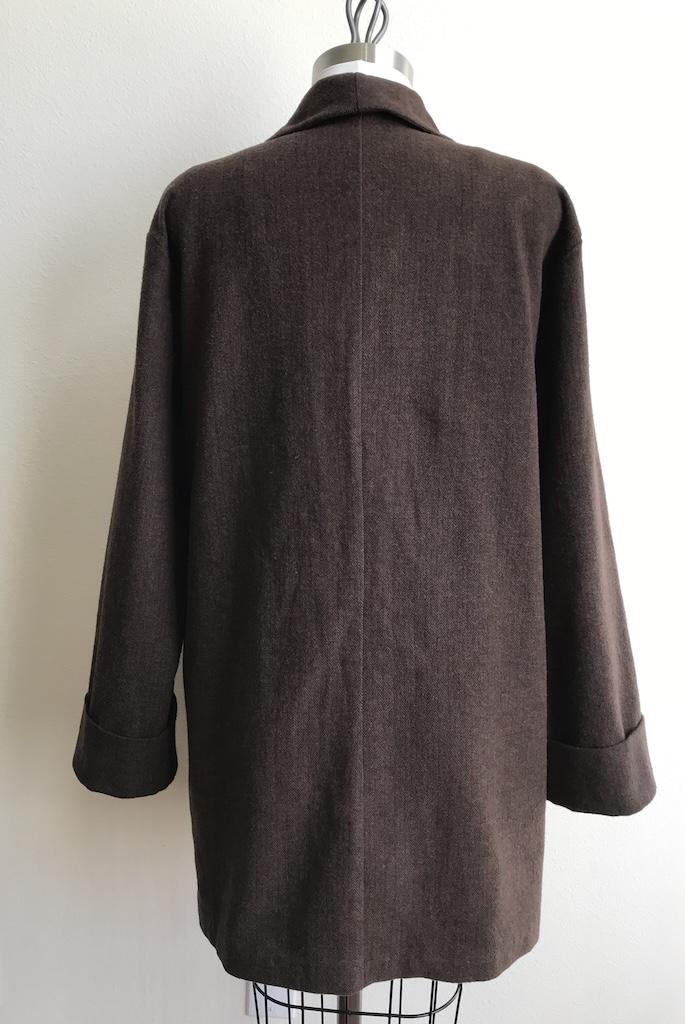
This sewing pattern is unlined, so I didn’t have to worry about making a lining. That’s the easy part about this project.
The tricky part might be the collar and lapel. I didn’t have an issue sewing these parts, but I can see how they might be confusing for some to follow.
The collar and lapel are one piece. Then you have a front dart that is hidden under the lapel.
Otherwise, it’s not too difficult. I basted all the seams, which is my usual process.
Then I sew my permanent stitch and finish them with the serger.
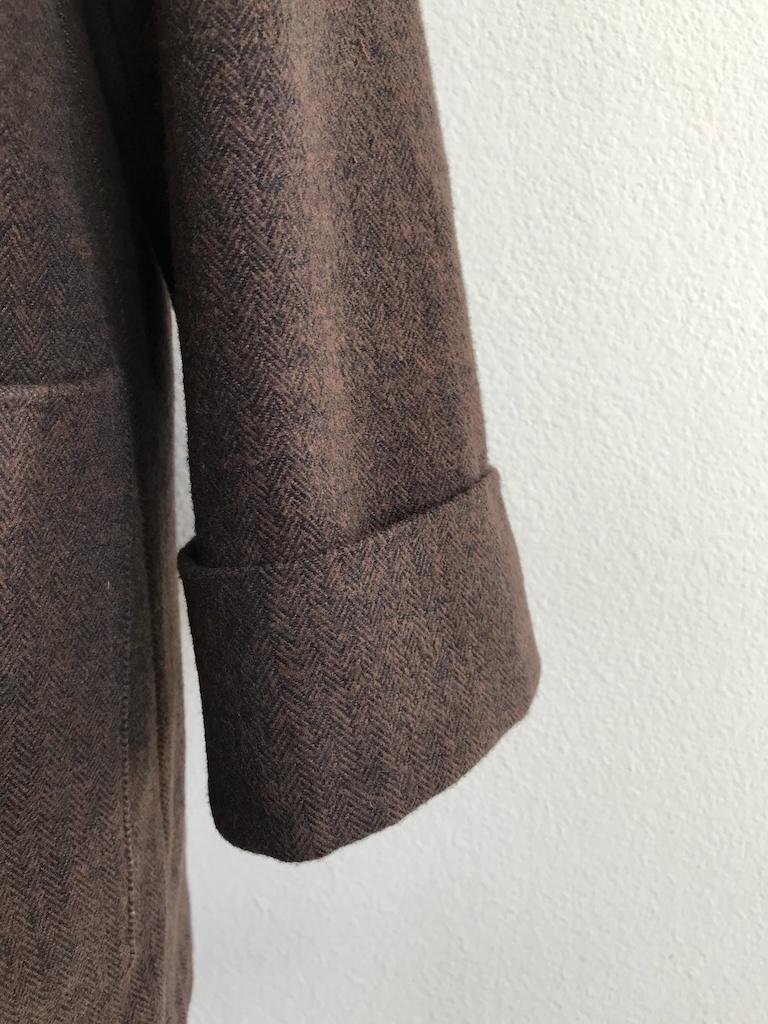
I must talk about the cuffs on this coatigan. They are nice and wide, and I love them.
I always tack my cuffs in place to keep them down, or in this case, up.
I sewed a couple of stitches on the inside. That way, they aren’t noticeable, and they stay in place.
The other thing I love is the nice big patch pockets in the front. They add to the cute factor of this design. And they sure come in handy.
Adjustments
I realized I had too much room around the middle. So, after wearing my coat, I went ahead and added long darts in the back.
They were thin, but gave the garment a little shape.
Otherwise, it fits pretty well, and I like the length. Next time, I’ll consider sizing down or making a curve in the waist area so it won’t be so boxy.
Finishing Details
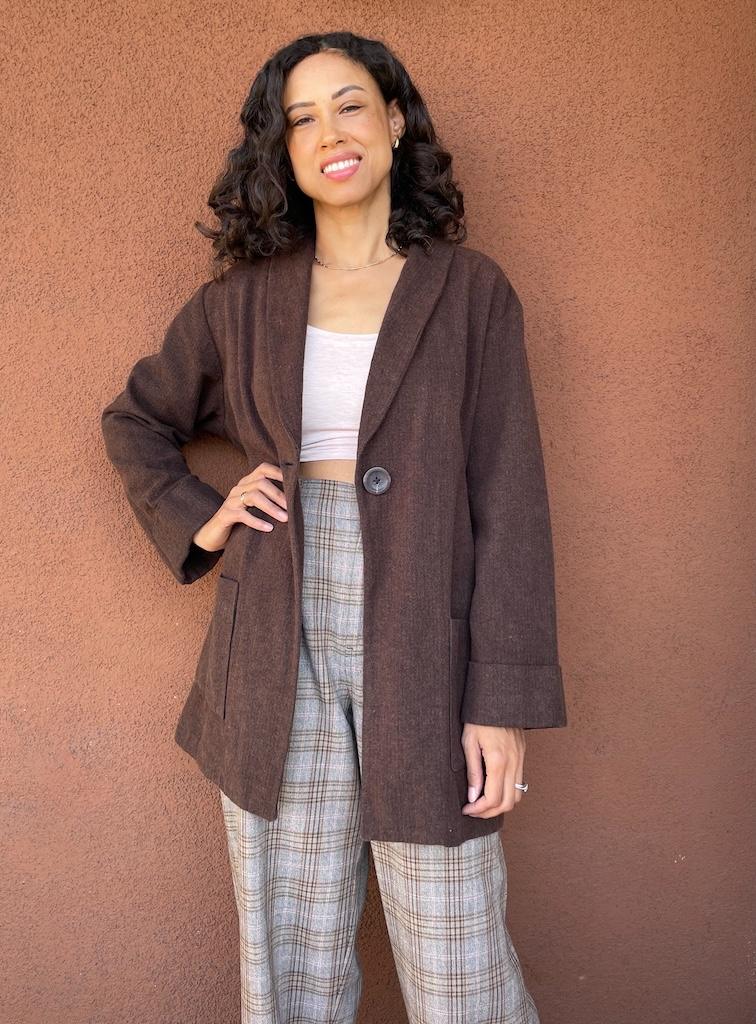
The sewing pattern does not call for a fastener in the front. But I added a buttonhole and a large button.
If you add a fastener, pin the coat in the front when finished. See how much overlap you have to play with before making a buttonhole.
I had enough overlap to add a button or snap. I can close it in the front and wear it comfortably without any pulling.
Then you’ll want to mark where to make your buttonhole. If you don’t like making them, stick with a sew-on snap.
Be sure it’s past the lapel and not on it.
Project Notes
There is a variation to use sweater knit fabric. I plan to make that version in the future.
This is such a cozy piece, and it reminds me of a friend in Chicago who always wore a similar style one back in the day.
It’d work well for the Windy City and anywhere else in the fall. Speaking of which, I’ve been adding more brown pieces to my wardrobe.
The rich brown complements my skin tone. Brown is my new black!
Final Thoughts
My coatigan goes with many of my outfits. It’s a versatile piece that looks good with leggings, jeans, and pencil skirts.
You can create my look with a crop top and wide-leg pants. It would also work with tapered pants, too. There are so many cute ways to wear it!
More Sewing Projects
- Do you like a zip-up long jacket to wear in windy places too?
- I made a lined dress coat for those formal and informal occasions.
- What about another cardigan that I hacked into a hoodie?
- What about making a double-sided scarf to go with your garment?
Originally published: January 14, 2025