Disclaimer: This post may contain affiliate links. As an Amazon Associate, I earn from qualifying purchases.
Lately, I’ve been attaching jeans buttons to a lot of jackets. So how do you do this without bending them?
Well, I’ll tell you, when I first started doing this years ago, mine would not come out straight! I thought I was hammering it on wrong.
Despite watching videos that didn’t help, I solved my problem by trial and error. So I’m going to show you how I do it step-by-step!
Materials
These are the things you’ll need.
- Jeans buttons
- Awl
- Pencil or marking tool
- Hammer
- Flat surface
- Cutting mat
Notes on Choosing Jeans Buttons
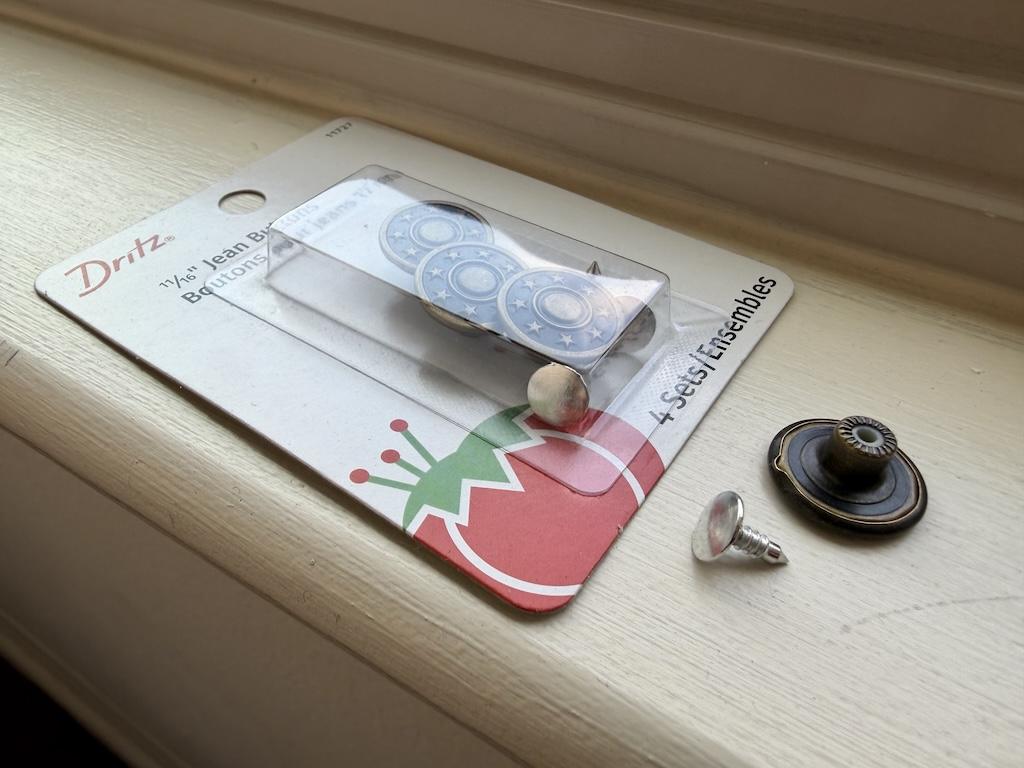
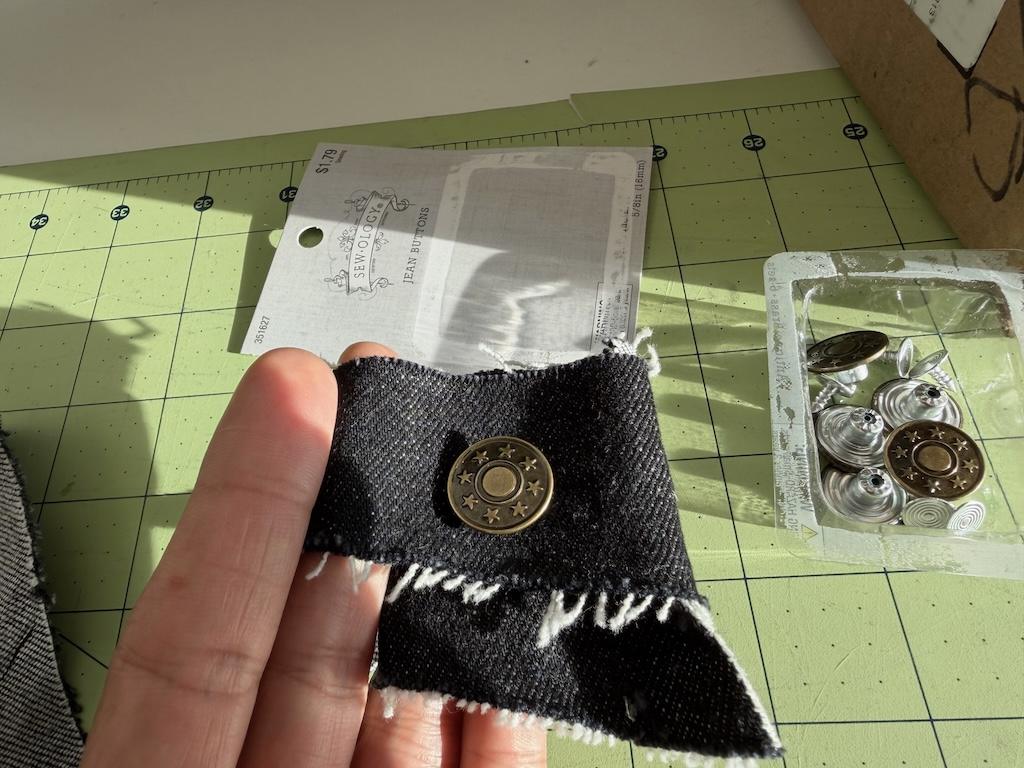
I use Dritz jeans buttons, and they work for me! I haven’t had any problems with them, so these are the ones I prefer.
By the way, a jeans button has two parts. The cap is the flat top piece, and the tack is the part that has a point (looks like a nail).
Notes on Choosing a Flat Surface
I use my cutting table, and it’s pretty sturdy. You want something that can withstand the force of a hammer.
So if you have a flimsy table, you might be better off using the floor or another surface.
You’ll want to place the cutting mat on the surface you’ll use. This will help keep the button from sliding. Plus, it’ll protect your surface!
Attach a Jeans Button So It Doesn’t Bend
Overall, we’ll hammer the parts of the jeans button together, and that’s how you attach them.
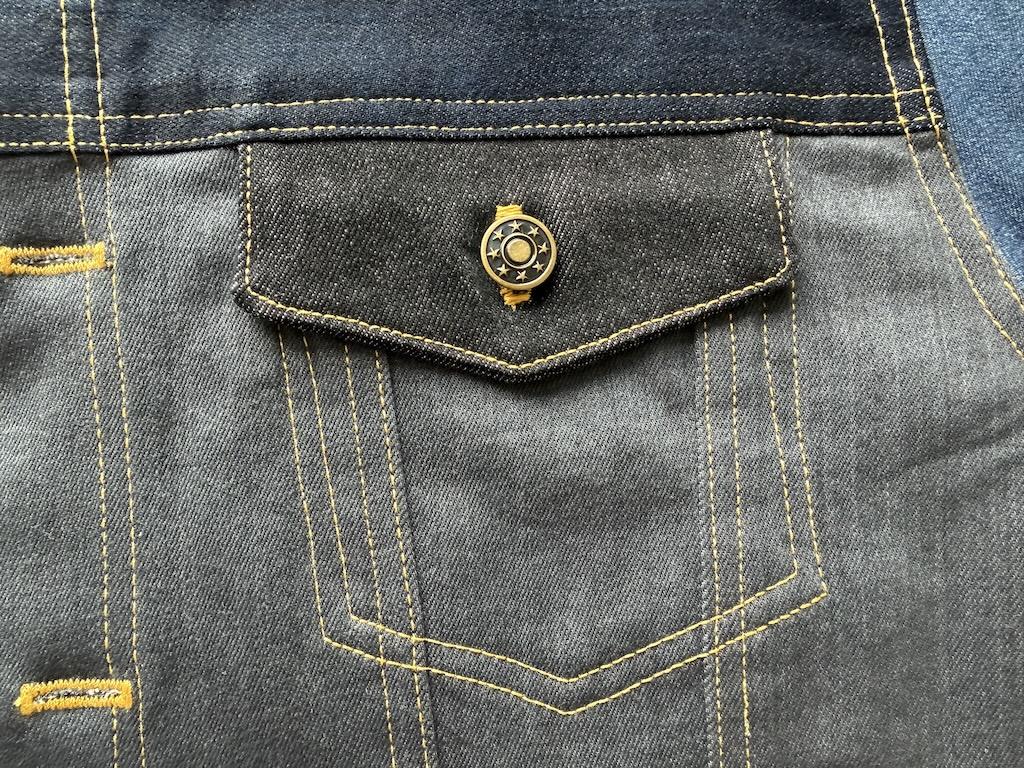
I use this same method to attach them to the front facing, cuffs, band, and pockets.
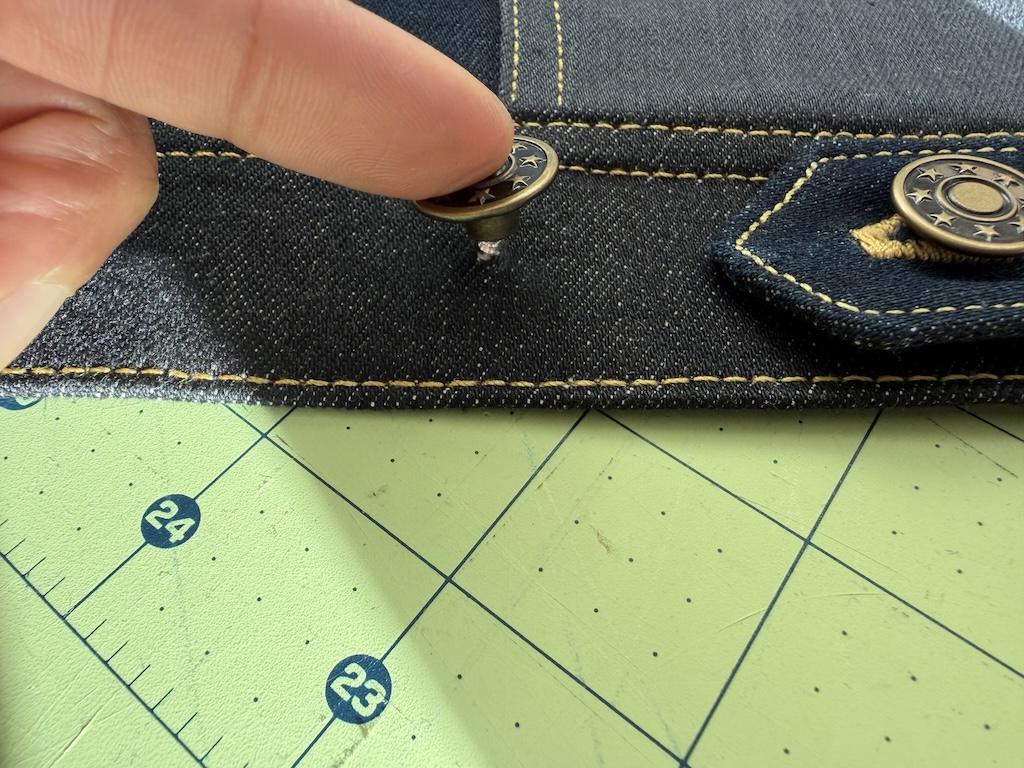
1. Mark your button placement.

The first thing you’ll want to do is use the pencil or marking tool. Mark the placement of where the button should be.
I do this by lining up my buttonhole and finding the center of where the button should be.
2. Use the awl to make a hole.
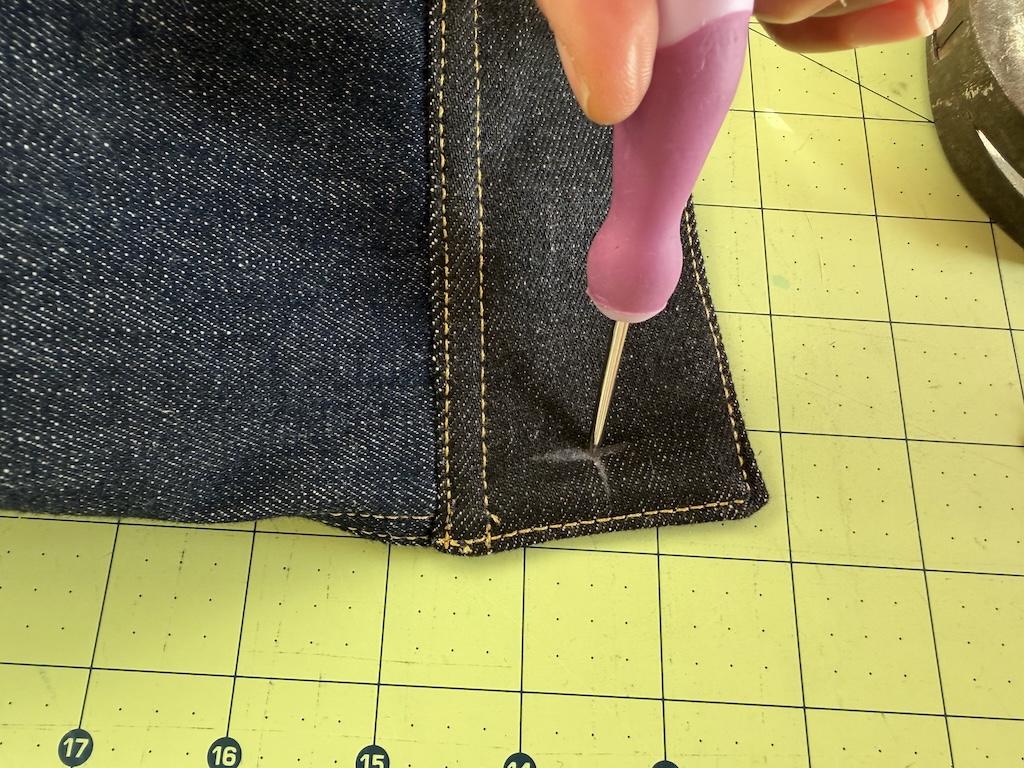
Use the awl to make a small hole where the mark is. I punch it through the fabric.
You might need to work it through, like I did. I’m dealing with a couple layers of heavy fabric plus interfacing here.
Don’t try to make the hole wider, as we want the back of the jeans button (the tack) to fit snugly.
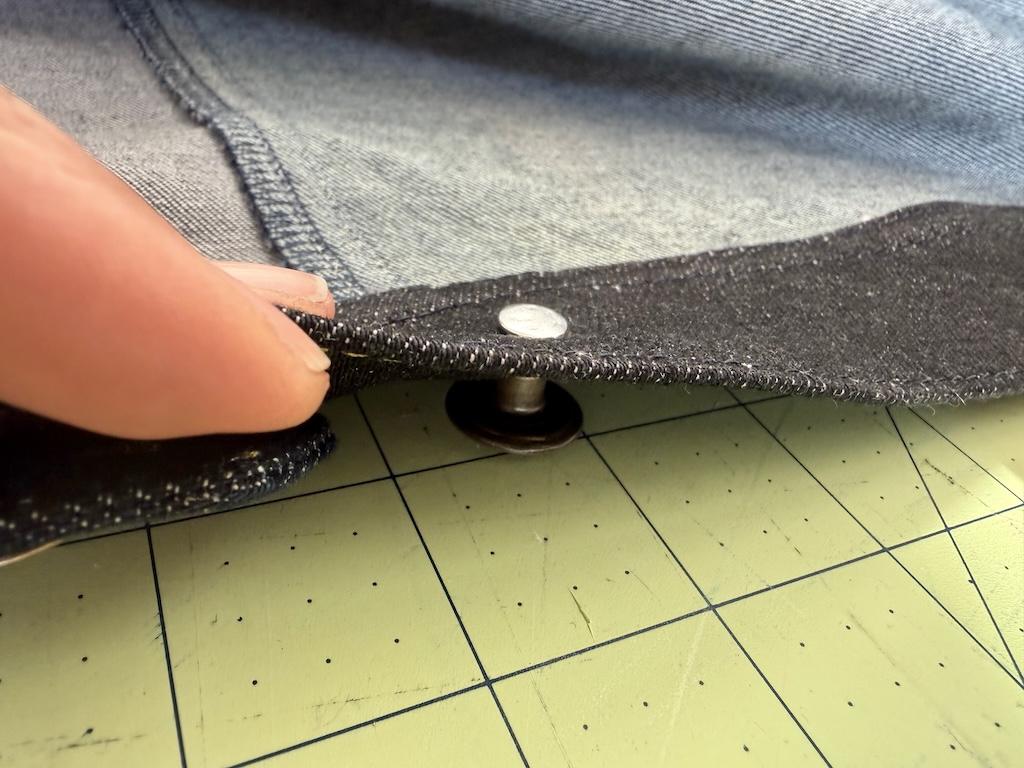
3. Push the tack through the hole.
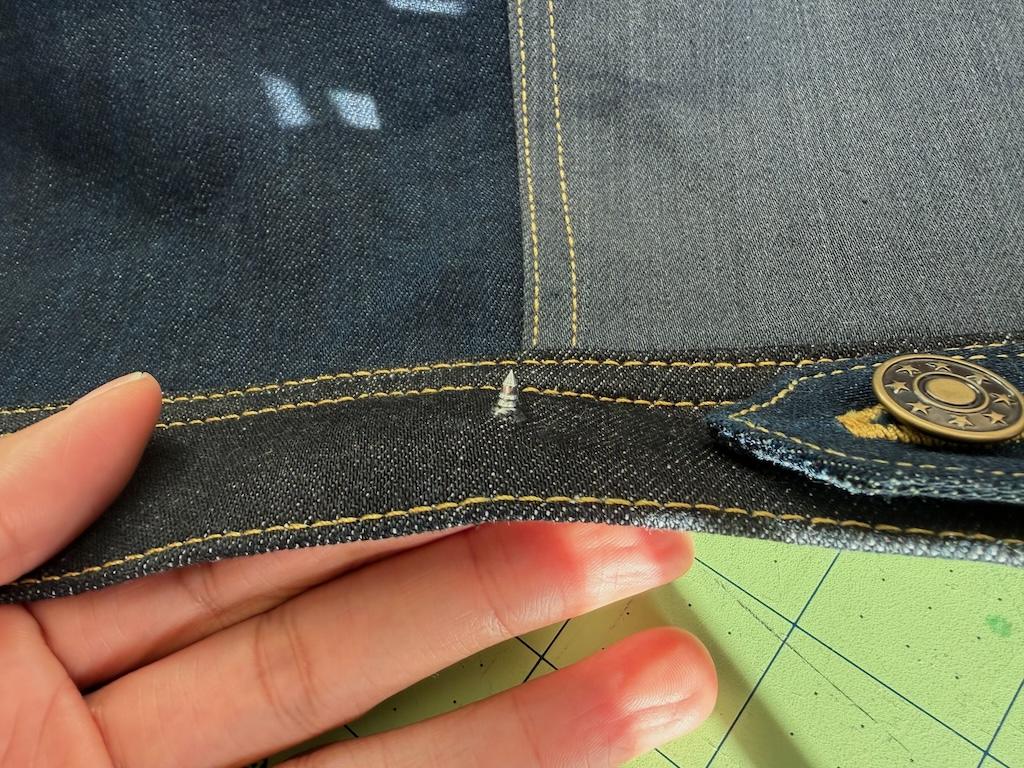
Now take the tack and push it through the hole. Start from the inside of the garment.
The pointy end should be on the same side of the right side of the fabric.
Notice how the end is wide like an actual tack or nail, so the wide flat end stops it from going all the way through the hole.
4. Press the cap on the tack.
Now I take the cap and press it on the pointy end of the tack. When I press mine together firmly, it stays.
Make sure it’s on there straight and not wobbly.
5. Flip the button and garment.
Now I flip the garment and button so that the cap is face down and flat on the cutting mat. (My cutting mat is on my table, which is my hard surface.)
The back of the tack should be facing you.
6. Hit the tack with the hammer.
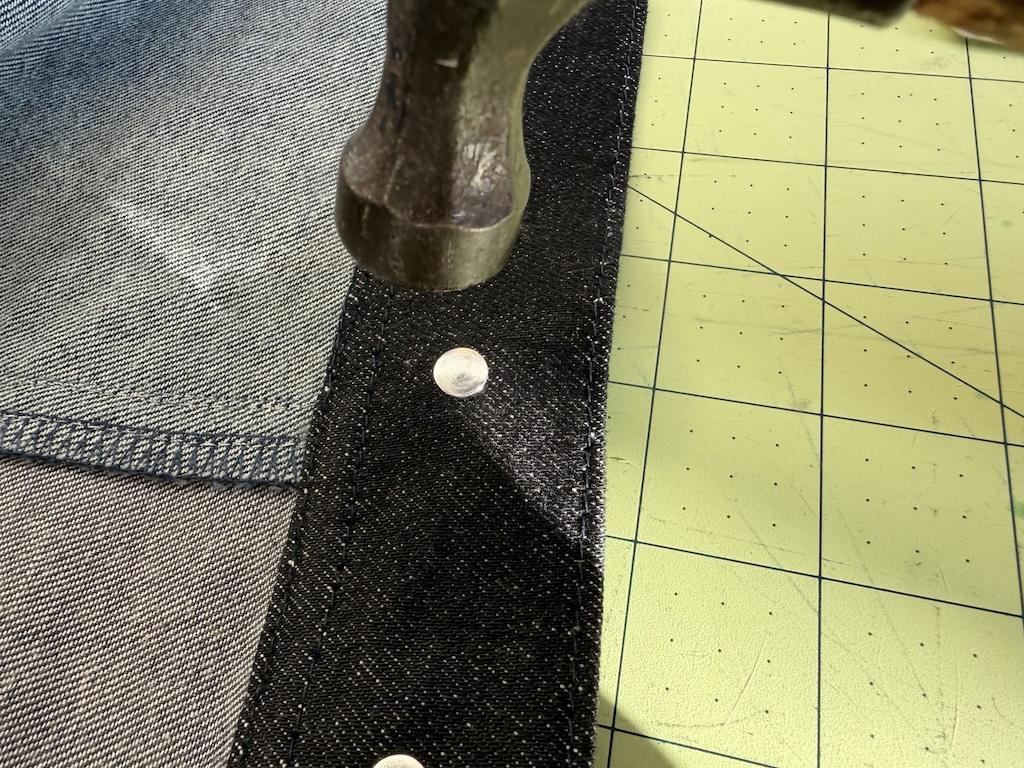
Now I make sure the cap is still aligned to the tack. The button should be straight, and the tack should not be tilted.
I keep my fingers out of the way! (No need to hold the button in place.)
Now I give the tack a good whack with the hammer. Be sure to hit it right in the center of the tack.
I hit mine about 5 times to get it snug.
7. Check the button.
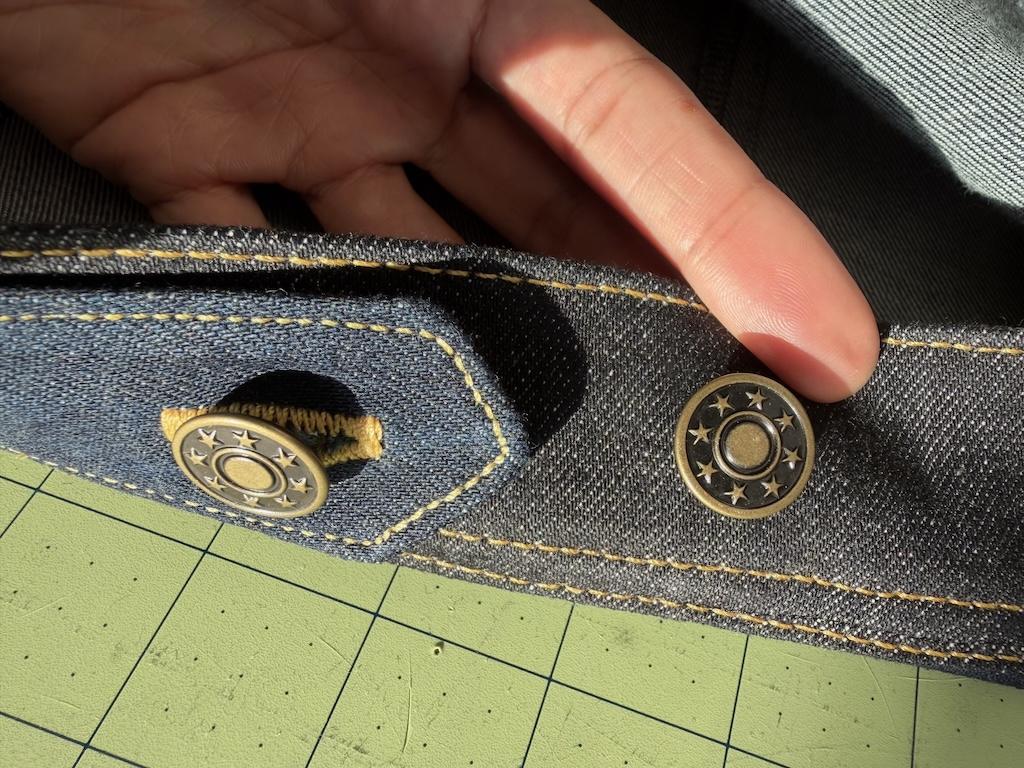
At this point, you’ll want to flip the button over and check that it’s affixed. Pull on the cap and tack to make sure they don’t come apart.
It should be tight enough that it’s not jiggling around much. I find mine twists a little, but that’s okay.
8. Repeat with the other buttons.
You did it! Now you can do this same process with all the other buttons.
If you must attach one to a pocket like I did, the method is the same. But you’ll have to hit the tack through the back side of the fabric, as it would be hard to hit it inside of the pocket.
Notes
I’ll see people adding jeans buttons by hitting the cap with the hammer instead. I find this method can make the cap bend. It doesn’t work for me!
That’s why I like to strike the tack part instead. I made sure the cap is on a nice flat surface, and I hit the center of the tack.
Also, I like to use a lightweight hammerwhen attaching jeans buttons, as it’s easier to control. I find the heavier hammers tend to bend my buttons.
I’ll buy cheaper buttons to run tests on scraps. You can find them at craft stores for around 99 cents.
Practice if you’re uncertain, as removing these buttons is another problem!
Overall
It’s so annoying to finish a garment and attach jeans buttons, and they bend! Trust me, I know the feeling, and that’s why I had to find a solution.
For whatever garment you’re working with, I hope this method works for you. You’ll have to tell me how it came out!
Read More
- Check out my upcycled denim jacket that I added these buttons to!
- Another solution would be to sew on shank buttons, and that’s what I did for my sateen denim jacket.
- But make sure you use a spacer when sewing a button by hand! And I’ll show you.
Originally published: June 4, 2026